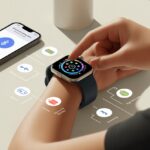
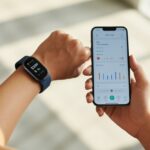
All we really have to do is pair the tracker to our phone, grab the official app, and create an account so our steps and heartbeats finally count for something.
Honestly, it’s way easier than deciphering spy codes or wrestling with flat-pack furniture from that Swedish megastore.
If we can tap a screen and follow a few prompts, we’re already most of the way there.
Most trackers use Bluetooth to link up with our phone, and the app handles the rest—just follow along, even if we’re half-awake (though, maybe don’t nap through it).
There are loads of online guides and videos to help if we get stuck, like this walkthrough on connecting a fitness tracker to Android.
Let’s sync up, get moving, and yes, those steps to the fridge totally count.
This isn’t just about another gadget—it’s about making fitness tracking simple, a little fun, and way less confusing.
Unboxing Your Fitness Tracker
Let’s get that shiny new tracker out of the box and ready to roll.
We’ll see what’s hiding in the package and make sure nothing important gets lost in the excitement—like that sneaky, easy-to-miss user manual.
What’s in the Box?
There’s something satisfying about peeling away the plastic and cracking open the box.
Usually, the fitness tracker sits right on top, looking fancier than expected (love that).
Next to it, there’s almost always a charging cable—usually a weird shape you’ll never find again, so let’s not misplace it.
Sometimes, we’ll spot extra wristbands in different sizes or colors.
If we’re lucky, there’s a tiny plastic film on the screen—don’t miss that dramatic first peel.
Occasionally, they toss in a screen protector or cleaning cloth, because smudges are inevitable.
Here’s a quick checklist:
Fitness tracker (the main event)
Charging cable (don’t toss it!)
Extra or replacement wristbands
Screen protector or cleaning cloth (maybe)
User manual lurking somewhere
Let’s keep all of it together—losing a cable or mismatched wristbands is just asking for trouble.
Locating the User Manual
The user manual really loves playing hide-and-seek.
Sometimes it’s taped to the box lid, other times it’s wedged under a tray or buried beneath the accessories, acting like it’s not the key to our sanity when pairing the tracker.
When we finally track it down, it’s usually a tiny booklet or a pamphlet folded into impossible shapes, often in a bunch of languages.
It might look boring, but this little guide is a lifesaver for setup—charging, app connections, and figuring out what that weird button actually does.
When we get a new tracker, we want it to actually feel like ours.
From telling it who we are to setting up reminders, those little tweaks really make a difference.
Setting Up Your Profile
Let’s start with the basics: name, age, height, and weight. The tracker isn’t here to steal anyone’s identity—it just needs to know how tall we are before counting our steps as Olympic-level.
If we’re setting goals, this info makes calorie tracking and step measurements way more accurate.
It’s worth being honest (even if our age is a well-kept secret). Typing this into the companion app or device settings helps the tracker figure out calorie use, heart rate zones, and sleep scores.
Some apps let us upload a profile picture. No rule says it can’t be a photo of our dog, but maybe keep it simple.
We can usually edit our goals for steps, water, or sleep right here. After a good breakfast, setting a step goal higher than “walk to the fridge” just feels right.
If we hit a plateau, it’s easy to change things up. The fitness tracker doesn’t judge.
Configuring Notifications
Now, notifications—those little nudges that remind us to stand, move, or drink more water. The tracker wants us healthy, not annoyed.
In the app, we pick which notifications we want. We can turn off the ones that ask us to celebrate every three steps.
There are options for call, text, and app alerts too. If Uncle Bob’s memes aren’t our thing, we can turn off message notifications or just allow our favorites.
Customizing these saves our sanity and stops our wrist from buzzing every time a distant cousin posts a meme.
Here’s a tip: set Do Not Disturb times so our tracker doesn’t wake us at 3 AM.
Syncing our fitness tracker isn’t as scary as it sounds—unless we’re afraid of the little waiting circle. We just need to know what syncing does and what to do if our gadgets decide to give us attitude.
Understanding Data Sync
Syncing data really just means connecting our fitness tracker with our phone, tablet, or computer. Most trackers use Bluetooth to send activity data—like steps, heart rate, and sometimes even sleep quality—straight to a companion app.
Usually, we start by downloading the tracker’s official app. After signing in and following the instructions, we pair the tracker by turning on Bluetooth, maybe waving our phone dramatically (hey, it can’t hurt), and tapping “connect.”
The app will show a progress bar, a spinning circle, or maybe just a message saying, “Hang tight while we sync your awesomeness.”
If we use a special app like Healthy 365, the process might ask us to enter a code, adjust permissions, or even restart the device—because technology loves drama.
When syncing works, all our hard-earned stats show up in the app, and nothing vanishes into tech limbo. Some trackers sync automatically when we open the app, while others want us to hit a manual sync button.
Troubleshooting Connection Issues
Sometimes our fitness tracker tries to play hard to get and just refuses to sync. If that happens, don’t panic—or toss it out the window.
Here are some fixes that usually work:
Check Bluetooth. Is it on? Is our phone asking for attention? Sometimes it turns off if ignored.
Restart devices. Both the tracker and the phone can use a fresh start. Unplug, replug, or take out the battery if possible.
Reinstall the app. No shame in a fresh download. Sometimes the old app just needs to retire.
Reconnect the tracker. Remove it from the app, then add it again like we’re meeting for the first time.
App updates. Outdated apps love to misbehave.
If our health app still isn’t syncing data between devices, we might need to tweak cloud and privacy settings, or check iCloud for iPhone users—details are listed here.
And if all else fails, the tracker’s help section might save the day—or maybe a funny new watch face will bribe it into behaving.
Wearing Your Fitness Tracker Correctly
Getting a new fitness tracker is exciting, but wearing it the right way matters just as much as charging it. Comfort and accurate tracking go hand-in-hand, so let’s make sure we look cool and get those sweet stats.
Wrist Placement and Adjustment
When it comes to wearing our fitness tracker, placement is key. We don’t need it hugging our fingertips, but experts suggest wearing it about one or two finger widths above the wrist bone.
This way, the sensors get a better reading, and we avoid giving our wrists weird tan lines.
Let’s not turn the tracker into a tourniquet. Tightening the band too much can cut off circulation and leave us with odd red marks.
If it’s flopping around like a fish, it won’t do its job. The best bet is a fit that’s snug but still lets us move our hand easily.
Many fitness trackers let us switch wrists depending on preference. Wearing the device on our non-dominant hand helps with more accurate step counting because it moves less while we’re busy texting, typing, or throwing our hands in the air.
No one wants their fitness tracker to become a fashion prison. To keep things comfy, we should take a break from wearing it now and then, especially when showering or charging.
This helps prevent skin irritation and gives our wrists time to breathe.
Regular cleaning is another must, unless we’re aiming for wrist cheese. A gentle wipe-down with a damp cloth keeps both the band and sensors in top shape.
If we love swapping bands to match outfits, make sure each one feels just as comfortable.
For those who dislike wrist accessories, there are alternative ways to wear a tracker. Ankle straps, bicep bands, or even clip-ons can work, as long as the device stays secure and touches the skin.
No matter where we wear it, a fitness tracker should feel like a helpful companion, not handcuffs.
Exploring Key Features
Setting up a fitness tracker is exciting, but if we don’t know what these tiny wrist coaches can do, we might miss out on some pretty useful features. From counting our steps to keeping an eye on our heartbeats, our fitness band has surprises if we bother to look past the clock.
Step Tracking and Activity Stats
Let’s be real—half the reason we got a fitness tracker was to “see” how much (or little) we actually walk. Step tracking is usually front and center.
Most devices use a small motion sensor to count every step, whether we’re speed walking or just hustling to the fridge.
On top of step count, our tracker usually estimates distance, calories burned, and sometimes floors climbed. All these stats show up on the device or in the app.
Many trackers let us set step goals and celebrate when we hit them with a buzz or a cheesy badge. Some also track other activities like biking or swimming, so our “I was totally active today” story is actually backed by data.
Want more details? Many trackers break down our activity stats into hourly charts or daily, weekly, and monthly summaries.
That means no more convincing ourselves we’re Olympians because we walked around the block twice.
Heart Rate Monitoring Basics
Now, let’s talk about monitoring our heart rate. Apparently, our hearts aren’t just full of love—they’ve got numbers to prove it.
Most modern trackers use a tiny light on the back that shines through our skin to measure blood flow.
We get our heart rate in beats per minute, which tells us a lot about our fitness level and intensity during workouts. Some trackers even chart our resting heart rate over time, helping us notice changes that could mean we’re getting fitter (or maybe just need another nap).
During workouts, our devices sort heart rate into zones, like “fat burn,” “cardio,” or—if we’re really pushing it—the dramatic-sounding “peak.” Seeing which zone we spend time in helps us tweak our routines for better results.
And honestly, nothing says “I work out” like a heart rate chart that looks like a roller coaster. We can view these logs in apps or right on the device.
When we unwrap our shiny new fitness tracker, we want it to fit our style and daily schedule—not just count our steps. That means getting into the nitty-gritty of display tweaks, swapping out those default faces, and making sure it actually wakes us up before the rooster crows.
Let’s make our tracker feel like it was made just for us.
Customizing Display and Watch Faces
First things first, we don’t want our fitness tracker looking boring. Choosing a new watch face isn’t just for style—it helps us see what we care about most.
Some folks love seeing their daily step count front and center. Others want the time in bold, so they’re not late for snack breaks.
Most trackers let us change the main watch face by pressing and holding the screen or through their app. We can usually pick designs that fit our mood, from digital numbers to analog style.
Some allow us to add little widgets, too—battery life, weather, or even our heart rate for that guilt trip when we skip the stairs.
Feeling fancy? A few devices let us upload custom photos. Nothing says motivation like a picture of our favorite pizza reminding us to walk a bit farther before dinner.
Let’s be real—if we could remember everything ourselves, we wouldn’t need a tracker! Setting up alarms is usually as simple as diving into the alarms section in the device or mobile app.
We can add everything from morning wake-up calls to “don’t forget your water bottle” buzzes.
Some trackers even offer smart alarms, which nudge us gently awake during light sleep. No more jumping out of bed in full panic mode.
Reminders go beyond meetings; we can set up gentle nudges for movement every hour, bedtime, or even hydration goals.
We can usually personalize alarm tones and vibration strength. Loud or just a mild shake, it’s all up to us.
These features are designed to keep us on track—and maybe, just maybe—help us remember our grandma’s birthday.
Maintaining and Caring for Your Fitness Tracker
Let’s face it, our fitness trackers go through a lot. Sweat, rain, and even that mysterious goo stuck to our gym bag. To keep our gadgets looking sharp and working right, we need to treat them well and not just leave them at the bottom of a laundry pile.
Cleaning and Storage
We need to get cozy with cleaning our fitness tracker. After a workout or swim, it’s smart to rinse and dry the device so it doesn’t start smelling like gym socks.
Sweat and moisture can build up, so it’s best to wipe down the band and watch with a soft, lint-free cloth.
Storing our tracker in a dry, cool place is also key. Tossing it into a backpack full of old sandwiches isn’t recommended.
We should avoid tight spaces where buttons could get pressed, and definitely keep it away from direct heat or sunlight to avoid damage.
Here’s a quick checklist for cleaning and storage:
Rinse after swimming or sweating
Dry the band and sensor area
Use mild soap if needed, but not harsh cleaners
Store in a case or dry area (not a steamy bathroom)
Battery Life Best Practices
Fitness trackers definitely don’t run on good vibes—they need battery power, plain and simple.
If you want the battery to stay healthy, try not to let it drop to zero every time. Charging it when it hits around 20% is just a smarter move, and honestly, it helps the battery last longer.
Leaving your tracker plugged in overnight? Probably not the best idea. That habit can actually stress the battery out over time. If you skip that, your device might just stick around longer.
If you know you’re not going to use the tracker for a while (maybe you’re taking a break or just feeling lazy), stash it away with a half-charged battery. It’s kind of the sweet spot for storage.
Turning off stuff like GPS or continuous heart rate tracking when you don’t need them? That really stretches out the battery. And hey, if you want to get serious about battery life, these practical tips are actually pretty helpful.
Hi, my name is Garrett Jones, and I am a tech enthusiast. I enjoy researching the new tech that has been released, and have a vast knowledge of the best tech to purchase.
From a young age, I have always had a big interest in technology, and this blog is an extension of that interest. Through this blog, I hope to provide others with all of the information they need regarding tech options to consider, and things such as compatibility. Some of the different items I will be discussing include headphones, smartwatches, and how to fix common issues.