Let’s be real—most of us have stared at our fitness tracker, totally unsure if we’re about to break it by yanking off the wrong band or jamming it into a charger that just doesn’t fit. If you’ve ever felt like charging your wrist gadget requires an engineering degree, you’re not the only one. The simplest way to charge a fitness tracker? Pop off one strap (usually it just snaps off), find the hidden USB plug, and stick it into a USB port.
Some trackers use a small charging cradle instead, so we get to play the “hunt for the right cable” game. Honestly, it’s not as hard as it looks once you know where to look for that sneaky charging spot.
If you want more details about popping off bands and charging the right way, this guide on how to charge a smart band is pretty handy.
With all the different tracker styles out there, knowing which charger we need saves us a lot of headaches—and prevents those tragic wristband mishaps. So, let’s figure out how to charge our fitness trackers without launching a band across the room.
Understanding How Fitness Trackers Charge
Charging a fitness tracker looks simple, but there’s a bit more going on than just plugging in a random cable. The way we charge—and what we use—can actually help our gadgets last longer and make sure they’re ready when we need them.
Types of Charging Methods
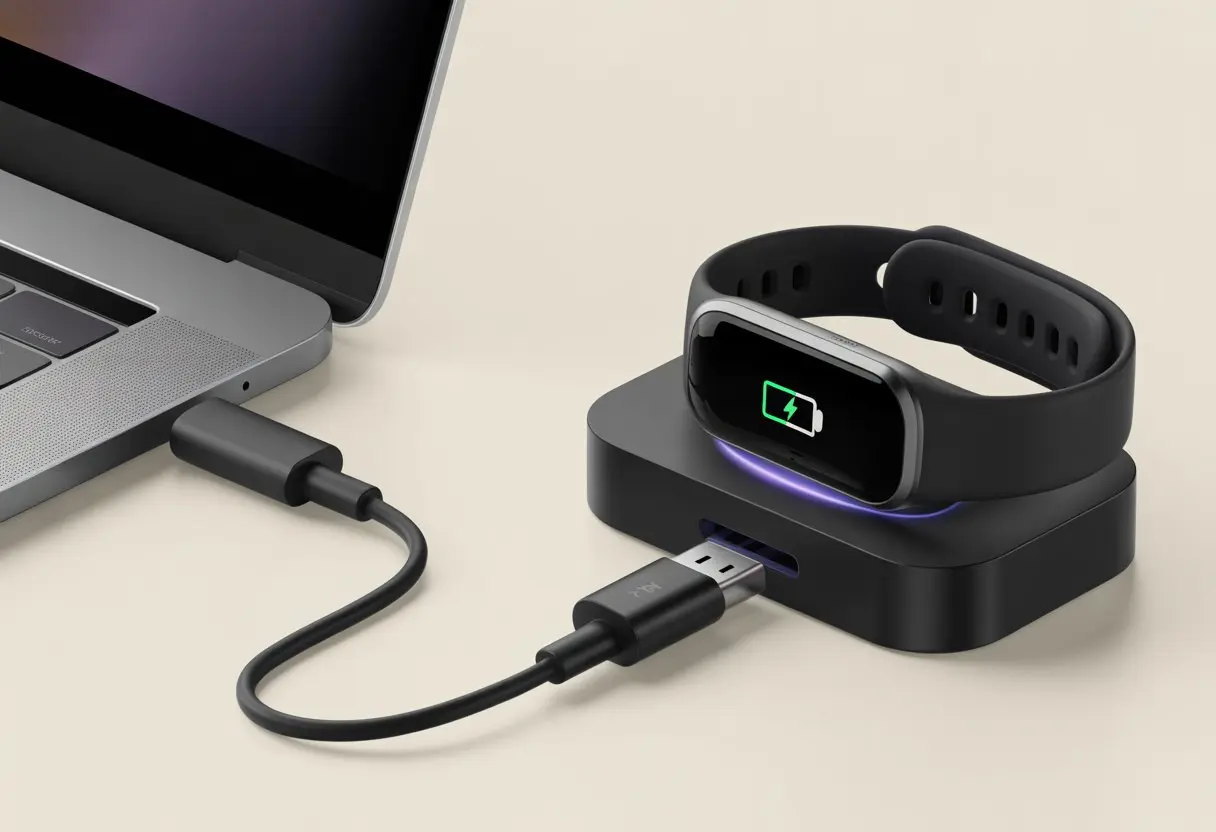
Fitness trackers usually use either a direct USB plug or a special charging dock. Some models hide a charging prong under the wristband—like a weird little treasure hunt—so we have to pull off one side of the band to reveal the USB tip.
Others come with a magnetic dock that snaps on, almost like it’s hugging your tracker. Then there are those flat cable cradles that seem to exist just to tangle in our drawers.
Each method has its perks. Direct USB charging is great for travel. Magnetic docks feel a bit fancier, but they’re not always universal. We have to know which type we’ve got so we don’t jam the wrong thing in and break something.
For step-by-step help, these guides can walk us through some common charging styles.
Common Charging Ports and Cables
Fitness trackers use all sorts of ports and cables, so it’s smart to check before raiding the cable box. Many trackers use a USB-A plug that fits into laptops, wall adapters, or power banks.
Some use micro-USB, USB-C, or even a mysterious custom charging cable that always seems to disappear when we need it most.
Here’s a quick look at common ports:
| Port Type | Used In | Pro | Con |
|---|---|---|---|
| USB-A | Older and direct-plug trackers | Universal | Bulkier, less modern |
| USB-C | Newer and premium trackers | Fast charging | Not always included |
| Magnetic Dock | Many mid-range and premium consumer electronics | Easy to connect | Must use original dock |
| Proprietary | Brand-specific fitness trackers | Secure fit | Easy to lose, hard to replace |
Finding the right cable is half the battle. We’ve all tried a phone cable in a pinch, only for the tracker to stubbornly refuse to charge.
Lithium-Ion Battery Basics
Most fitness trackers run on a lithium-ion battery. This small but mighty power source quietly tracks our steps, sleep, and sometimes those questionable workouts.
Lithium-ion batteries are common in consumer electronics because they’re light, hold a good charge, and can be recharged many times.
To keep the battery happy, try not to let it drop to 0% too often. Charging when it hits around 20% helps the battery last longer.
A full charge usually takes about 1–2 hours, depending on the tracker. Sticking to these habits means we’ll spend more time actually wearing our tracker and less time wondering why it died halfway through the day.
Preparing Your Fitness Tracker for Charging
Every fitness tracker needs a little prep before we plug it in. Battery checks save us unnecessary charging breaks, and regular cleaning keeps things running smoothly.
Checking the Battery Level
Nobody wants to charge more than they have to. Most trackers show the battery right on the main screen or in their app.
If it’s below 20%, it’s probably time to charge. Waiting until the battery is low helps keep it healthy, so try not to top up after every walk (even if we’re feeling proud).
If there’s no display, look for a blinking light or check the battery percentage in the app.
A low battery icon usually shows up as red or empty. Some brands buzz or flash lights. If the tracker won’t turn on, try charging it anyway—a dead battery sometimes just needs a little nudge.
Cleaning the Charging Port
Let’s keep our charging port clean—seriously, dust and sweat love to hide in those tiny spaces, and they can block the connection. A dirty port might stop charging or even cause corrosion later.
Grab a soft brush or a dry cotton swab. Gently clean around the metal contacts.
If there’s stubborn gunk, flip the tracker upside down and tap it; sometimes that’s all it takes.
Avoid water and don’t poke around with metal tools—one slip can lead to an expensive repair. If you have a can of compressed air, that works too. Regular cleaning helps us avoid annoying charging issues. For more tips, this cleaning guide is worth a look.
Step-by-Step Guide: How to Charge a Fitness Tracker
Charging a fitness tracker isn’t rocket science, but wow, there are a lot of ways to mess it up. If you’re tired of your device dying halfway through a walk, it’s probably time to get your charging routine sorted.
Locating the Correct Charger
Before we panic and try random cables, let’s actually hunt for the right one. Most trackers have a special charging cable or dock that only fits one way.
Our user manual is the secret decoder ring for this—don’t toss it, even if it’s boring.
Keep the charger somewhere safe, like next to your phone charger or in a labeled drawer. Using the right charger helps prevent damage and keeps our tracker working. If the original is lost, look up the brand or model and get an official replacement.
Connecting the Charging Cable
Now for the tricky part: attaching the cable. Make sure the pins or connectors on the charging cable line up with the tracker’s port.
If you’re charging something like a Fitbit, you’ll usually hear a click or feel magnets snap into place when it’s connected, as shown in this Fitbit charging guide.
If the cable doesn’t fit, don’t force it—these gadgets aren’t built for wrestling. Some charging cables have pins that match up with gold dots or strips on the tracker. It’s a bit like a secret handshake: get it right, and the tracker lights up; get it wrong, and nothing happens.
If nothing lights up, try flipping it or check for dust.
Plugging into the USB Port
Once the cable is attached, give it some power. Most tracker cables are USB, so plug them into a computer, wall adapter, or power bank—basically anything with a bit of juice.
If you’re using a wall adapter, make sure it’s not some sketchy off-brand that might fry your device.
Try to avoid plugging into USB ports meant only for data—they don’t always supply enough power. If you’re staring at a mess of cables, the one for your phone usually works best.
And please, don’t use damaged or frayed cables—they’re just waiting to let you down.
Monitoring Charging Progress
Once everything’s plugged in, check if your tracker is actually charging. Most trackers show a battery icon, a blinking light, or vibrate to let you know.
If your device is silent, check the connections or try another USB port. It’s good to check back now and then—most trackers fully charge in about one to two hours.
Some show the percentage, others just give you mysterious symbols. The user manual can help decode these. If your tracker stays at zero forever, try resetting it or swapping cables. And hey, it’s fine to scroll through your phone while you wait—just remember to unplug the tracker when it’s full so the battery lasts.
Brand-Specific Charging Tips
Let’s be honest: charging a fitness tracker shouldn’t feel like a science project. The main thing is to use the right cable, keep the connectors clean, and avoid unplugging it too soon.
Charging correctly helps features like the heart rate monitor work better.
How to Charge a Garmin Fitness Tracker
Let’s talk Garmin. Garmin trackers usually come with a charging cable that looks a bit like tiny chopsticks.
To start, line up the charging pins on the cable with the contacts on the back of the tracker—think of it as docking a spaceship, but less dramatic. Make sure the cable snaps in snugly so you don’t lose power in the middle of your day.
Plug the USB end into a wall adapter or computer. To keep the battery healthy, avoid letting it drop to zero before charging again.
Garmin actually recommends keeping the battery around 50% if you’re going to store it for a while. So, don’t just toss it in a drawer for months—give it a quick charge first.
You can get more details straight from Garmin’s own tips.
How to Charge a Fitbit Device
Fitbit fans, let’s give these fitness trackers the juice they deserve. Each Fitbit comes with its own charging cable—nope, that old cable in the kitchen drawer just won’t work.
Before you start charging, check if the gold pins on the cable line up with the little ports on the back of your tracker. If you get a good fit, you should feel a click.
The device usually vibrates or shows a battery icon—kind of like a tiny thumbs up from your tracker. Don’t unplug it right away.
Let it reach 100% if you want a full day of steps and heart rate tracking. If you run into weird charging issues, try cleaning the contacts gently with a dry cloth.
The Fitbit Help page has quick instructions if you get stuck. And hey, always use the official Fitbit app to check battery health and get reminders.
That way, your tracker stays happy and your step count stays smug.
Maximizing Battery Life and Device Care
We all want our fitness tracker to keep up with our busy days and survive our donut-powered morning jogs. Keeping the battery healthy and treating our gadgets right means less time hunting for a charger.
Daily Charging Habits
Nobody wants their tracker to die just as they hit their step goal. Most fitness trackers last longer if you don’t let the battery drain to zero too often.
Try charging when the battery dips to around 20-30%. No need to wait for a full-blown low-power panic.
It’s actually smart to stop charging at about 80-90% instead of always pushing for that heroic 100%. Charging to full all the time—especially overnight—can stress the battery over time.
If you’re planning to store your tracker for a while, give it a partial charge. Top it up to 50% every six months, just like Apple and Fitbit suggest.
Quick Tips:
- Unplug when charged
- Avoid deep discharges
- Store in a cool, dry place
Avoiding Common Charging Mistakes
Our fitness tracker isn’t invincible—it can’t survive everything. Avoid sketchy chargers that could cause a meltdown.
Stick to the official cable or a trusted brand to dodge safety risks. Never charge it on soft surfaces like beds or under pillows.
That can make it overheat, which is bad news for both the tracker and us. Don’t leave it plugged in for days unless you want it to age faster than your motivation to exercise.
If the device feels hot, smells weird, or acts up, unplug it and check the safety info right away. A little common sense and care keeps our fitness tracker tracking—and us worry-free.
Troubleshooting Charging Issues
Sometimes fitness trackers just check out when it’s time to charge. You look down and see a blank screen or no battery icon at all.
Let’s figure out what to do before we launch our trackers out the window.
Troubleshooting Steps for Charging Problems
First, make sure you plugged the cable in the right way. If the screen stays blank, you might have a loose connection or faulty USB port.
Dust, lint, or mysterious crumbs in the charging port can also block a proper charge. Here’s a quick to-do list:
- Unplug and plug the charger back in, making sure it fits snugly.
- Try a different USB port or a wall charger (go for UL-certified if you can).
- If you still see no charging symbol, reset the device by pressing the button on the charging cable three times, holding each press for about a second. This trick works for many trackers, like the Fitbit Charge 5.
- Clean the connectors on your band and charging cable with a soft cloth. Please, resist the urge to use your shirt sleeve.
If your tracker still looks dead, check if it’s upside down on the charger. Some bands only work one way.
Give your tracker a once-over for any damage—bathroom mishaps totally count.
When to Contact Support
We all want to be tech heroes, but sometimes the universe just won’t cooperate. If you’ve tried different cables, outlets, resets, and maybe even some positive thinking, your tracker might need expert help.
Reach out to support if:
- The battery won’t charge at all, even after all troubleshooting steps.
- The charger and cable work with other devices, but not with your tracker.
- You see physical damage, like bent pins or battery leakage.
- Your tracker overheats or flashes error messages whenever you try to charge.
Have your model number and purchase info ready before calling or emailing support. It’ll help things go faster and, with any luck, bring your fitness tracker back to life—no magic spells required.
If you’re still stuck, check out community forums or detailed Fitbit troubleshooting tips online.
How Proper Charging Impacts Fitness Tracking
If we want our fitness tracker to be our trusty sidekick, we really need to treat its battery right. Otherwise, things like heart rate, sleep data, and even GPS can end up just as confused as we are before morning coffee.
Heart Rate Accuracy
When we keep our tracker charged, it measures our heart rate smoothly, all day long. Ever tried running with a tracker limping along at 5% battery? Not fun.
Low battery makes the device skip updates or turn off sensors to save power. Then, our heart rate data ends up looking more like a messy drum solo than a steady rhythm.
A well-charged device can use its sensors more often. That means more accurate and frequent readings.
The company scientists call it “data fidelity,” but honestly, we just call it “not missing a heart attack.” Regular charging helps the heart rate monitor actually keep up with us, whether we’re sprinting or just panic-walking to the fridge.
Tracking Sleep and Activities
We might want to believe we’re awake and active all the time, but our tracker knows better—if it’s charged enough to last through the night. With a full battery, the tracker keeps working while we sleep, walk the dog, or win an imaginary marathon at 2 a.m.
Low battery can make the device shut off, leaving us with missing sleep or activity records. That skips a chunk of our health report card.
For more tips on charging, check out this simple charging guide. Our tracker’s bedtime totally depends on it!
Table:
| Battery Level | Chances of All-night Tracking |
|---|---|
| Full | Excellent |
| Half | Good |
| Low | Unreliable |
GPS and Fitness Goals
Is there anything more annoying than starting a workout, only to realize your GPS just quit because you forgot to charge up?
When you keep your device charged, GPS actually works the whole time, mapping your route and making your stats make sense.
If your battery drops too low, most trackers just shut off GPS to save themselves. It’s frustrating to check your run and see a straight line through buildings and a pond—unless you’ve suddenly learned to walk on water, that’s not what you want.
A well-charged tracker keeps your fitness goals on point, with solid maps instead of weird mystery lines.
It’s honestly worth charging up before a big workout or a long walk, just to make sure your distances and achievements are real and not just guesswork.
After all, nothing beats showing off a mapped route and a shiny trophy for your hard work.

From a young age, I have always had a big interest in technology, and this blog is an extension of that interest. Through this blog, I hope to provide others with all of the information they need regarding tech options to consider, and things such as compatibility. Some of the different items I will be discussing include headphones, smartwatches, and how to fix common issues.
- How to Charge a Fitness Tracker Properly Without Starting an Electrical Fire - June 15, 2026
- How to use a smartwatch for pet tracking: Outsmart Your Sneaky Furry Escape Artist - June 14, 2026
- Why do my Bluetooth headphones not work with my smart home devices? Is My House Allergic to Wireless Tech? - June 14, 2026
Related Posts:


