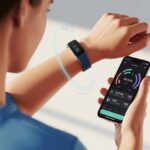
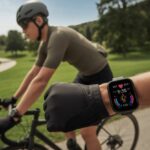
If we’re tired of guessing how far we’ve pedaled or how many cookies we’ve actually earned, maybe it’s time to get a little more real (well, sort of) with a fitness tracker.
Using a fitness tracker for cycling lets us see our distance, speed, heart rate, and even the calories we’re burning. Finally, we can brag with actual numbers—no more wild guesses or stretching the truth with friends about those “epic” rides.
We just strap it on, hop on the bike, and let the little device handle all the counting and tracking. A lot of us use cycling watches, smartwatches, or bike computers, and each one brings handy features like GPS tracking and real-time stats.
Some, like Garmin Edge models, let us add sensors for extra details. Others, like the Fitbit Surge, keep things simple but still get the job done for most rides.
With a good tracker, we actually know if we’re improving, coasting, or just looping the parking lot for fun. Let’s dig in and see how to use these gadgets for better—and maybe a bit more honest—results every time we ride.
Choosing the Right Fitness Tracker for Cycling
Picking a fitness tracker for cycling can feel a bit like shopping for jeans—so many choices and we just want one that fits right. Let’s talk about the features, top brands, and how these trackers stack up against bike computers.
Key Features to Look For
Honestly, most of us don’t remember where we rode yesterday, so built-in GPS is a must. GPS lets us track our real route and speed, not just that sprint to the fridge.
An accurate heart rate monitor helps us know if that hill really got our heart pounding or if we were just “deeply inspired.” Water resistance is a dealbreaker. Even if we avoid biking in storms, sweat is a fact of life.
Many fitness watches claim to be water-resistant, but we should double-check the rating. Nobody wants to turn their tracker into a tiny aquarium.
We need long battery life unless we plan on stopping every couple hours to charge up. Syncing with our phones and having easy-to-use apps makes sharing those “I beat my old record!” moments way easier.
Here’s a quick list of must-haves:
GPS for route and speed
Heart rate monitoring
Water resistance
Long battery life
App compatibility and easy syncing
Popular Brands and Options
When it comes to brands, Fitbit and Garmin usually lead the pack. Fitbit’s Charge line is simple and reliable, kind of like that friend who never flakes.
Garmin’s watches bring more advanced features—detailed maps, ride metrics, all the stuff for data nerds and cyclists who want to see every stat. If you want more suggestions, check out Bicycling magazine’s smartwatch picks.
Apple Watch is a solid choice for folks already deep in the Apple world. It tracks rides and heart rate with style, though, let’s be real, sometimes the battery just can’t keep up.
Price matters too. Garmin usually costs more but offers serious tools for cyclists. Fitbit focuses on basics, which keeps it friendlier for our wallets.
Comparing Fitness Trackers vs. Bike Computers
Ever wonder if you really need a fitness tracker or if a bike computer is better? Let’s break it down:
Feature
Fitness Tracker
Bike Computer
Tracks rides
Yes
Yes
Heart rate monitoring
Yes (usually wrist)
Yes (often chest)
GPS navigation
Most models
Almost all
Water resistance
Varies
Usually high
Extra cycling metrics
Basic
Advanced
Battery life
1–7 days
Up to weeks
Fitness trackers are built for all-day use. They track walking, sleep, runs, and more.
They’re lighter, good for sharing activity with friends, and double as regular watches.
Bike computers are all about cycling. They have bigger screens, longer battery life, and loads of cycling-specific stats like cadence and total ascent.
Some guide us through turn-by-turn navigation, which honestly saves us from getting lost—or at least lets us pretend we’re on a top-secret mission.
If you want a device that does everything, a GPS watch like Garmin or Fitbit is a solid pick. Hardcore cyclists might prefer a dedicated bike computer.
Before we can speed off and show off our stats, we need to make sure our tracker isn’t just a fancy wristband. We want it to capture all the sweat, pedaling, and GPS-powered glory—without any hassle.
Syncing With Your Phone and Cycling Apps
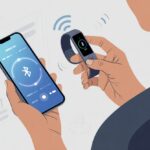
First, let’s pair our fitness tracker with our phone. Most trackers use Bluetooth for syncing, so we just follow the on-screen prompts and hope for the best.
Popular apps like Strava, Zwift, and Google Fit make this step pretty painless. They walk us through the process, telling us when to pair, tap, or mutter “Why isn’t this working?”
Apps like Strava let us share maps, stats, and heart rate data. Zwift transforms the living room into a digital race.
Google Fit gives us step trophies and tries to make us feel extra healthy. We should check our tracker’s app permissions so it actually shares the right data—otherwise, we’ll end up stuck with “manual entry,” and nobody wants that.
Pairing With External Sensors
If we’re serious about numbers, it’s time to get nerdy and pair our tracker with external sensors. ANT+ and Bluetooth sensors can track heart rate, speed, and cadence, giving us more data than we probably need.
This extra info turns our training into something that feels more like Mission Control than a Sunday cruise. We should check what sensors our tracker supports.
Some only connect with Bluetooth, while others work with ANT+. Chest straps for heart rate are usually more accurate.
Speed and cadence sensors strap onto the bike frame. Once we pair them, the tracker pulls all that glorious data into our cycling app, making every ride a mini science project.
Adjusting Device Settings for Biking
Let’s make sure our tracker knows we’re cyclists, not just compulsive walkers. In the settings, we can switch the activity type to “cycling,” enable GPS, and set up notifications—or silence them if we’d rather not get texts in the middle of a hill sprint.
Turning on automatic ride detection saves us if we forget to start tracking. We can also tweak display options—some trackers let us pick which stat shows up first, like speed or heart rate, instead of some random motivational quote.
Double-check battery saver settings too. Nothing ends a ride faster than a tracker dying halfway to the best café.
Tracking Core Cycling Metrics
When we jump on our bikes and strap on a fitness tracker, we want more than just pretty graphs. We want hard numbers—speed, distance, heart rate, and GPS navigation—to help us figure out if we’re Tour de France material or just out for a coffee ride.
Monitoring Speed and Distance
Let’s be honest, nothing boosts our cycling ego like setting a new speed record or seeing a distance that makes couch potatoes jealous. Most trackers use sensors to keep tabs on how fast and how far we ride.
By checking our average speed, we can see if those interval workouts are working or if we’re still in “grandma-on-a-beach-cruiser” territory.
Tracking distance helps us plan rides and pace ourselves. Most trackers show both total distance and average speed right on the screen, so we don’t have to do math while pedaling uphill.
Advanced models break things down by laps or segments, which gives us even more to brag about online.
Fitness trackers make it simple: ride, check the numbers, and accept our fate (or glory). If you want to dig deeper, check out this cycling metrics guide.
Measuring Heart Rate and Heart Rate Zones
Heart rate is the difference between cruising and going full superhero. A good heart rate monitor—built-in or chest strap—shows us how hard we’re working.
By tracking our heart rate zones, we know when we’re in “easy-peasy” mode or when we’ve hit “call-an-ambulance” territory.
Most trackers let us set up custom zones, so we can chase that perfect mix of endurance and sweat. Watching our heart rate jump is a great way to stay aware of our limits—and maybe avoid racing the city bus.
Heart rate data also helps us check our progress as we train over weeks or months. For newer cyclists (or tech fans), some trackers even buzz if our heart rate goes too high or too low, keeping us safe.
Getting lost can be part of the adventure, but built-in GPS on our tracker means we don’t just ride—we explore. GPS logs our route and shows real-time stats like speed and location, so we avoid those “Where am I?” moments.
Using GPS functions turns our tracker into a mini navigation hub. We can follow new routes, retrace our steps, or share epic ride maps with friends (and finally prove we climbed that monster hill).
Navigation features often support route planning and live turn-by-turn directions. That’s a lifesaver if we tend to get lost or just want to avoid consulting phone maps while riding one-handed.
Accuracy varies, but even basic GPS helps track distance and keeps an honest log. For more info, check out this review of cycling watches with GPS.
Advanced Performance Metrics
Let’s put our fitness trackers to real work and dig into cycling data that actually helps us ride stronger. We can go way beyond step counts and calorie bragging by learning how to read advanced stats like power, cadence, pedal efficiency, and VO2 Max.
Using Power and Power Meter Data
If you want to know how hard you’re riding, nothing beats power numbers. Power, measured in watts, basically tells you, “Hey, this is how much work your legs are doing right now.”
When you slap a power meter on your bike, you get real-time feedback every second you’re pedaling. That’s a game-changer.
Track your average and max power from ride to ride. You’ll see if you’re actually getting stronger or just spinning your wheels.
Hold a steady power for longer? That means more cycling stamina (plus, you get to brag a little).
Pro tip: try short, hard intervals—sprints—and watch those watts spike. It’s like a mini fireworks show in your legs.
Analyzing Cadence and Pedal Efficiency
Cadence is just how many times you spin your pedals in a minute. Most folks find their sweet spot between 80 and 100 RPM.
Pedal too slow and it feels like you’re pushing through peanut butter. Go too fast and you might look like a hamster on an energy drink.
Fitness trackers usually show cadence, but some take it further with pedal efficiency stats. These show how much of your pedal effort actually moves you forward, not just spins the cranks.
Tweak your technique with these numbers and you’ll save energy—maybe even outsprint your buddies at the next coffee stop.
Honestly, telling someone you improved your pedal smoothness? That’s the ultimate humble brag.
Estimating VO2 Max Like a Pro
VO2 Max is just a fancy way of saying, “How much oxygen can your body use when you’re working hard?” The higher it is, the longer you can ride without gasping for air.
Modern fitness trackers can estimate VO2 Max after a few rides. This number shows how tough your lungs and heart are.
If your VO2 Max goes up over time, your training is paying off.
Here’s a tip: mix longer, steady rides with high-intensity efforts. That’s a proven way to boost this number and keep you strong on any ride.
All About Calories and Nutrition for Cyclists
Using fitness trackers with cycling isn’t just about speed or sweat. Tracking calories and dialing in nutrition gives you a real edge, both during rides and when you’re recovering.
Tracking Calorie Burn on Rides
Let’s be real—sometimes it feels like you burn a thousand calories just squeezing into your cycling kit. A fitness tracker takes out the guesswork.
Most good trackers use heart rate, distance, and speed to estimate your calorie burn. If you ride with a power meter, you get even closer to the truth.
One kilojoule of work on the bike roughly equals one calorie burned. It’s not perfect—bodies aren’t machines—but it’s close enough for snack planning.
Calorie calculators help you double-check, so you can adjust your snack strategy mid-ride. Ride at 200 watts for an hour? That’s about 720 calories burned. Just don’t try to eat that many cookies while pedaling.
Remember:
Flat roads use up fewer calories than hills.
Heavier riders burn more at the same speed.
Wind, weather, and even your socks can mess with calorie numbers.
Pairing Nutrition Plans With Data
Knowing your calorie burn is step one. Step two? Actually using that info so you don’t finish the day feeling like a wilted salad.
Match your nutrition to your effort. Eat too little and you’ll be dragging; eat too much and you’ll want a nap.
On long rides, aim for 30–60 grams of carbs per hour to stay steady.
Here’s a quick guide:
Activity Type
Typical Calories Burned
Nutrition Tip
Short, easy ride
200–400
Light snack before
Moderate ride
400–800
Bring a small bar or banana
Hard, long ride
800+
Start fueling early, bring portable carbs
Stay hydrated, and always test new foods on training days—not race day. Your stomach needs practice too.
Indoor cycling doesn’t have to be boring or confusing. With the right tools, you can turn your living room into a virtual bike trail and track every sweaty second like a pro.
Syncing With Smart Trainers and Apps
Let’s be honest, spinning in place can feel a bit ridiculous. But when you connect your fitness tracker to a smart trainer, you can jump into digital worlds like Zwift.
Smart trainers talk to your tracker using ANT+ or Bluetooth. It’s not magic, just clever tech.
Pair your tracker with the trainer or cycling app by following the prompts. Some trainers let you ride through virtual roads, dodging digital potholes and racing cartoon cyclists.
You can also sync with cycling apps like Zwift or other platforms to see your rides in glorious color.
Here’s how to get rolling:
Turn on Bluetooth or ANT+.
Open your cycling app and find your trainer.
Pair up and start pedaling—you’re set for a virtual race.
Logging Indoor Bike Rides Accurately
If you want your ride to count (and your snack to feel earned), log it right. Most fitness trackers have an “Indoor Cycling” mode—just scroll, tap, and go.
For best results, check if your bike or app can share power, cadence, and speed with your tracker. This helps your device track calories, distance, and effort more accurately.
If your bike can’t do this, you can still log rides manually. It’s not perfect, but at least your tracker knows you weren’t just scrolling memes.
Don’t forget:
Calibrate your equipment for accuracy.
Check for firmware updates.
Sync your ride often for stats (and bragging rights).
Training Plans, Goals, and Motivation Hacks
Jumping on a bike without a plan is like eating cereal with a fork—possible, but weird and not very effective.
Having a plan and some clear goals keeps you from riding aimlessly and actually gives your fitness tracker something to do.
Setting Up Structured Training Plans
Nobody wants to cycle aimlessly; training plans give your rides a purpose. Start by picking a plan that matches your fitness and goals.
Want to finish a century ride or just get through your first 10 miles? Pick a plan that fits, not one built for Tour de France hopefuls.
Most fitness trackers let you customize sessions. Add intervals (where you suffer on purpose), distance goals, or time targets.
Mix in cross training or easy days to keep things interesting. And yes, schedule rest days—even pros don’t go hard every day.
Keep your workouts organized with a digital calendar or app. You’ll be less likely to skip in favor of pizza.
Find more tips for setting up plans, including cross training advice, at johnnysprockets.com.
Tracking Progress and Achieving Goals
Fitness trackers shine when it comes to tracking. You get cold, hard numbers—distance, heart rate, calories, cadence—all the stats to justify your post-ride treat.
Set specific targets for motivation. Try classic SMART goals: Specific, Measurable, Achievable, Relevant, and Time-based.
“Bike 50 miles this week” beats “Bike…some, I guess?” Your fitness tracker shows if you’re making progress or if your bike is gathering dust.
Charts, graphs, and progress bars give you that sweet visual feedback. Fitness apps make tracking easy and even remind you if you skip.
Some platforms suggest adjusting your goals if you’re going too easy, as described on kylecoaching.com.
Motivation’s a rollercoaster, honestly. Keep it rolling by joining challenges, celebrating milestones (even tiny ones), and tracking everything with handy fitness apps.
High-fives all around!
Maximizing Battery Life and Device Longevity
Keeping your fitness tracker alive on long rides is key if you want to capture every pedal stroke. A few simple tricks help you dodge mid-ride shutdowns and keep your device ready for the next adventure.
Tips for Extending Battery Life
Let’s be honest—nobody wants to stop halfway up a climb just for a recharge. Stick with stock watchfaces whenever you can.
Custom graphics and moving widgets look cool, but basic options seriously extend battery life.
Turn off Wi-Fi, Bluetooth, and music streaming when you don’t need them. Lower your screen brightness, shorten backlight timeouts, and silence most vibration alerts for extra savings.
Track fewer sensors at once—like heart rate or GPS—if you want your battery to last longer.
Quick Table: Battery Saving Settings
Feature
Setting Suggestion
Watchface
Use basic or stock face
Connections
Disable Wi-Fi/Bluetooth
Screen
Lower brightness, quick timeout
Alerts
Limit or turn off vibrations
Sensors
Track only what is needed
Best Practices for Device Maintenance
Waterproof ratings sound reassuring, but honestly, nobody wants to rescue their fitness tracker from the washing machine. After a sweaty ride or a surprise downpour, I always try to keep my device clean and dry. I grab a soft cloth to wipe the contacts, then just let it air dry—no rocket science there.
Charging up before the battery hits zero? That’s a habit worth picking up. Battery experts say it’s better to keep the charge between 20% and 80%—it’s almost like we’re babysitting the battery, right? If I know I won’t be cycling for a bit, I stash my tracker somewhere cool and definitely avoid leaving it to roast in the car or under the sun.
Pro Tip: Never use strong cleaners or rough towels. Honestly, these gadgets want a gentle touch, not an exfoliation. If we stick to these simple habits, our fitness trackers will probably stick around longer—and we’ll spend less time messing with tech problems and more time riding.
Hi, my name is Garrett Jones, and I am a tech enthusiast. I enjoy researching the new tech that has been released, and have a vast knowledge of the best tech to purchase.
From a young age, I have always had a big interest in technology, and this blog is an extension of that interest. Through this blog, I hope to provide others with all of the information they need regarding tech options to consider, and things such as compatibility. Some of the different items I will be discussing include headphones, smartwatches, and how to fix common issues.